Home automation
- Сверхбыстрое распознавание речи без серверов для управления “умным” домом
- Control Your Home with NFC Tags + HomeKit in iOS 13 and Hass NFC – Android app to control Home Assistant.
- Open Source - бесплатный умный дом – обзор Home Assistant, Homebridge, MajorDoMo, ioBroker, Domoticz, OpenHab.
Node-RED:
MQTT:
- Как подружить OpenHAB и Arduino через MQTT (смотри также ссылки в разделе Похожие публикации)
Zigbee vs Z-wave vs WiFi:
Domoticz:
Zigbee
- Сети Zigbee для начинающих – выступление Егора Литвинова (@Xarlan) на RuCTF 2019
- Полёт пчелы. Как работают сети Zigbee и как искать уязвимости в них (@Xarlan) – рассказывает о структуре и безопасности сети, ключах и софте для работы, а также примеры оборудования (slides / local copy)
Hubs
- Elelabs Zigbee USB Adapter – based on EFR32MG13P732 chip from SiliconLabs that supports EZSP (EmberZNet Serial Protocol) and is directly supported by HomeAssistant.
Homebridge emulates the iOS HomeKit API to expose e.g. Zigbee devices to HomeKit.
Xiaomi Aqara Hub – $37.44 (€32.60)

- Integrates with Apple HomeKit
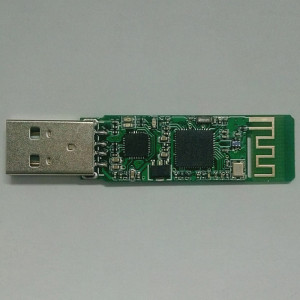
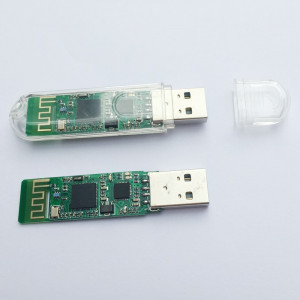
Coordinator sticks:

- A lot of supported devices (including IKEA Trådfri)
- Opensource firmware

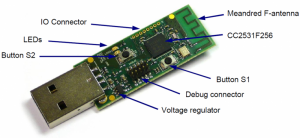
- CC2531 supports only 20 direct sibling devices (48 with alternative firmware).
 No limitation when some devices are working as routers or there are additional routers in the network, see share life experience with 15++ devices.
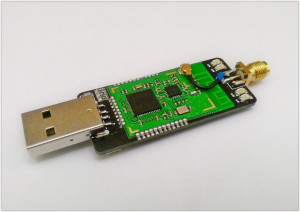
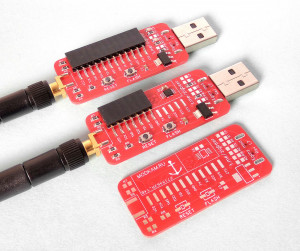
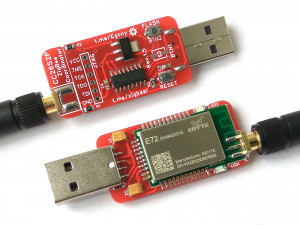
 - CC2531 has limited coverage (no external antenna). External antenna modifications:
Advantages / disadvantages of CC2531-based solutions:
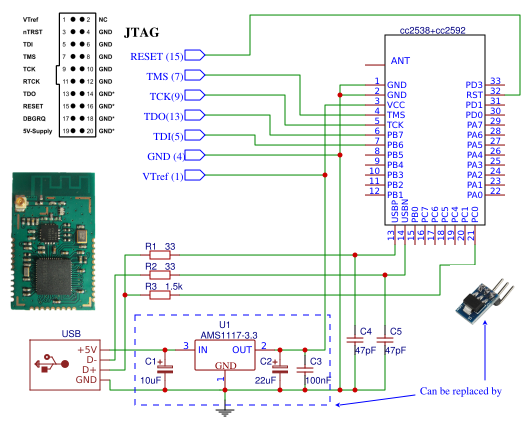
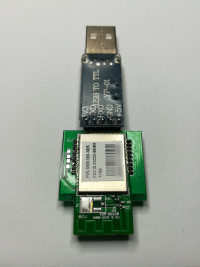
- Requires flashing of custom firmware on the stick (extra cables and debugger)
- СС2530/СС2531 flasher for ATmega328 / ESP32 – позволяет прошить Zigbee модули с чипом СС2530/СС2531, а так же BLE CC2540/CC2541 с помощью Arduino
- Requires running MQTT broker which is an extra component (however could be used by other IoT devices)
Installation:
- Use firmware Z-Stack_3.0.x.
- Run
# apt-get install nodejs npm
$ mkdir zigbee2mqtt
$ git clone https://github.com/Koenkk/zigbee2mqtt.git zigbee2mqtt/
$ cd zigbee2mqtt/
$ npm install
# cat <<'EOF' > /etc/systemd/system/zigbee2mqtt.service
[Unit]
Description=zigbee2mqtt
After=network.target

[Service]
User=homeassistant
UMask=0027
ExecStart=/usr/bin/npm start
WorkingDirectory=/var/lib/homeassistant/zigbee2mqtt
# Don't log output to syslog:
StandardOutput=null
# Below will restart the service StartLimitBurst times. For that set StartLimitInterval=RestartSec*StartLimitBurst+small_delta
Restart=always
RestartSec=30
StartLimitInterval=320
StartLimitBurst=10

[Install]
WantedBy=multi-user.target
EOF
# systemctl daemon-reload
# systemctl enable zigbee2mqtt
Other:
-
- Firmware for TI CC2538 based devices
У многих возникали вопросы про построение mesh-сети и почему устройство упорно не цепляются к устройствам-роутерам? До недавнего времени возможность подключения устройства к роутеру определялась положением звёзд, скоростью ветра и порядком выпадения карт… В прошивке 20201010 поправлен основной момент, разрешающий подключение устройств через роутеры.
- Open ZigBee Coordinator Backup Format – standardizing this format will allowing users to backup, restore, and migrate their networks between coordinator hardware.
Flashing via UART:
- Multi-device flasher – supports Sonoff ZBDongle-E, Easyiot ZB-GW04, SMLIGHT SLZB-07 / SLZB-07Mg24 / SLZB-06M.
Similar projects are:
- Zigbee to Tasmota (Z2T) – a lightweight Zigbee to MQTT solution running on an ESP82xx WiFi chip.
- Zigbee-Lua – Zigbee control framework written in Lua which supports ZCL/ZLL protocol extensions and has build-in HTTP server and MQTT client.
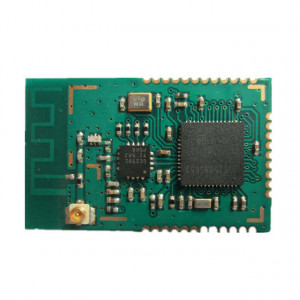
- The onboard placed radio module deRFmega256-23M12 contains an 8-bit AVR microcontroller with an integrated low-power 2.4 GHz transceiver for Zigbee / IEEE 802.15.4 applications.

- ZSHARK for Wireshark can be used to sniff Zigbee network

- not opensource
- Is based on JN5168-001 single chip wireless microcontroller.

- firmware/SDK is opensource
 (zigate firmware is supposed to be opensourced, but it’s dead at the moment)

- website/documentation is in French


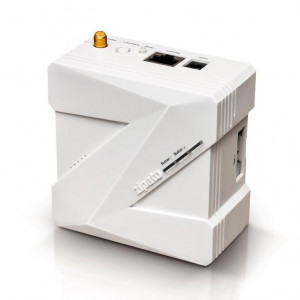
- ARM9 208MHz CPU, 64MB RAM, 128MB Flash, Linux 2.6
- Z-Wave, Zigbee (ext module), ONVIF / IPcam, SMS (ext. module)
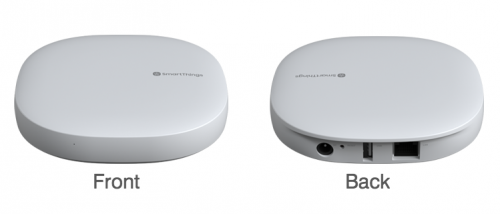
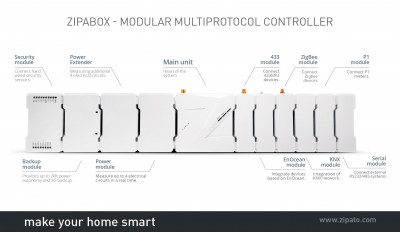
- Wi-Fi 802.11b/g/n 2.4GHz, Bluetooth 4.0 Low Energy, Zigbee 2.4GHz, Z-Wave Plus (433MHz, 868MHz), IR receiver/transmitter, NFC

Devices
- Search for Xiaomi Zigbee items
-
-
- Подборка статей @AlexxIT: “Как подключить непрошитый Sonoff к Home Assistant и не зависить от китайских серверов”, “Где купить выключатель без нуля в круглый подрозетник”, “Что почитать про организацию управления светом в умном доме”…
Switches
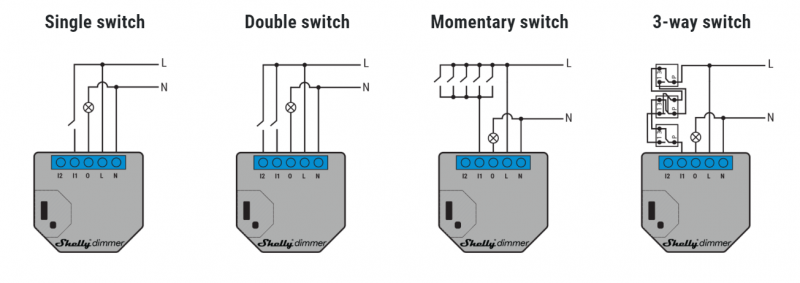
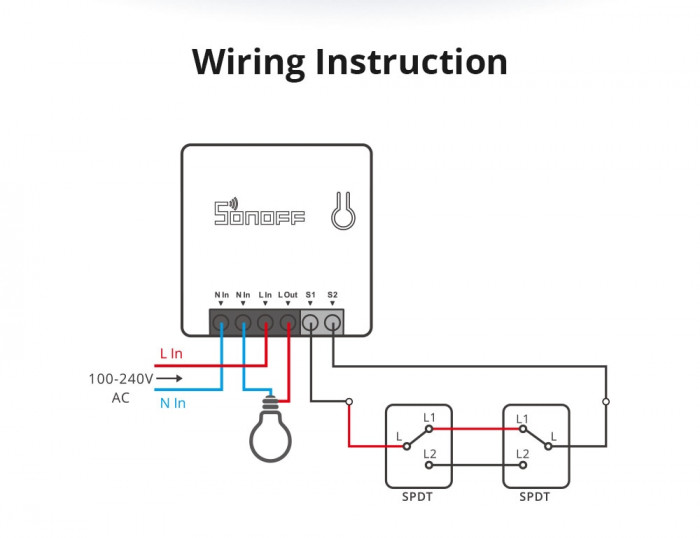
 Zigbee switches cannot work in 2-way mode with non-Zigbee (RF or WiFi) switches, see 10. Can I synchronize a 2 ways Zigbee switch and a none Zigbee 2 ways switch?. Это положение не подтверждается: функциональность Livolo 2-way никак не связана со способами удалённого управления: Zigbee 1-gang 2-way выключатель VL-C701SZ работает отлично в связке с обычным 1-gang 2-way выключатель VL-C701S.
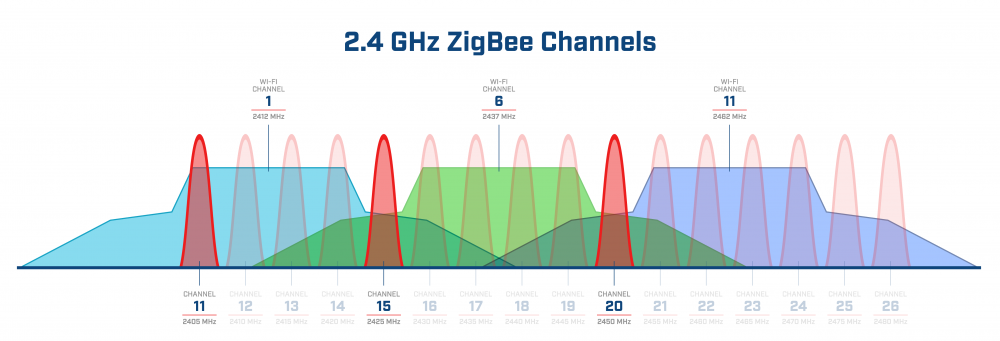
 Zigbee version works on 26 channel and with specific manufacture-locked extended pan ID, see Switch 1 or 2 Gang by Livolo.
 Livolo switches without group wire do not act as Zigbee routers (amperage is not enough to support that feature).
 After power is back (after power shut down or changing the lamp/load), the coordinator should be in “permit join” mode because Livolo devices re-announce themselves (and get a new short network address). Otherwise they don't return back to network.
 Livolo devices are flooding the network with requests (see this comment) which probably only Livolo switches may answer.
 RF switches use 433.92MHz frequency which allows it to be controlled using Arduino, see Controlling a Livolo RF Light Switch Using a Raspberry Pi 3 B in Python and ontrol Livolo switches / Livolo switch library. There is now way to update/get the current status, so communication is one-way.
 Еще раз про Livolo + схема + ремонт + допилинг – решение проблемы, когда выключатель реагирует на касания переключением светодиода, но реле не щёлкает
 Home Assistant configuration to fix Zigbee2mqtt issue with Livolo switch
Price comparison for 1 gang 2 way switch:
| Site | Product | Price |
|---|---|---|
| Livolo EU – Zigbee Schakelaars | VL-C701SZ | €44.95 |
| Livolo NL | VL-C701SZ + VL-C7-C1-12 | €49.95 |
| Alibaba | VL-C701SZ-11 | $35.97 (3-9 pcs) |
| Aliexpress | C701Z-C1EUZ-11 | €28.23 ($30.89) |
ESP32 based:
DIY:
Power sockets
FAQ
Control devices (switches) and bulb status update
Motion sensor: IKEA Trådfri or others?
The IKEA motion sensor talks to the bulb, Home Assistant can’t receive any signals from it directly. This means that you can’t create automations in HA based on the motion sensor alone. What you CAN do is make automations based on status of the bulb so that when the sensor triggers the bulb the bulb will in turn trigger something in HA. The efficiency of this is dependent on how fast HA gets the status of the bulb, so your mileage will vary, but depending on what kind of automation you’re looking for it could be worth a shot.
From zigbee2mqtt issue#247 and zigbee2mqtt issue#102:
You could control your Ikea bulb (or outlet) either with zigbee2mqtt only or with the remote only. Now you can use both in the same time, that's already a very good news.
What does interviewCompleted: false means?
data/database.db
{"id":4,"ieeeAddr":"0xccccccfffed5138a","nwkAddr":38336,"epList":[],"endpoints":{},"interviewCompleted":false,"meta":{}}
means that there was a problem when pairing with the device. To cure that do the steps from issue #2148:
systemctl stop zigbee2mqtt.service- Edit
data/database.dband setinterviewCompleted: trueandmeta: {"configured": 0}  Wake up the control device by clicking buttons on it
systemctl start zigbee2mqtt.service
“offline” problem on Zigbee map
Sniffing Zigbee traffic
apt-get install wireshark-gtk wireshark && ln -s /usr/bin/wireshark-gtk /usr/local/bin/wireshark(fix for wireshark command via alternatives)# apt-get install libstdc++-dev libusb-1.0-0-dev # wget -nv -O - https://github.com/homewsn/whsniff/archive/v1.3.tar.gz | tar -xz # cd whsniff-1.3 # make all install
 Assign a special group for CC2531 stick device so that it can be read by
 whsniff:# cat <<'EOF' > /etc/udev/rules.d/95-CC2531.rules ACTION=="add", SUBSYSTEMS=="usb", ATTR{idVendor}=="0451", ATTR{idProduct}=="16ae", MODE="660", GROUP="wireshark" EOF # udevadm control --reload Otherwise it should be run by root:
# cat <<EOF > /etc/sudoers.d/whsniff
$USER  ALL = NOPASSWD: /usr/local/bin/whsniff *
EOF
 Grant access to USB stick to some user
 usermod -a -G wireshark $USER
 or open a new root session with
su - wireshark
- Run
whsniff -c 11 | wireshark -k -i -
where
11is obligatory parameter that specifies ZigBee channel ID
More info:
Device tracking options
ZLL and Zigbee compliance
Chipsets can be the same but the issue with ZLL is that it can still be different from one manufacturer to another, there is no definite standard. Zigbee HA1.2 is better and Zigbee 3.0 will be best and fully compliant across all Zigbee protocols.
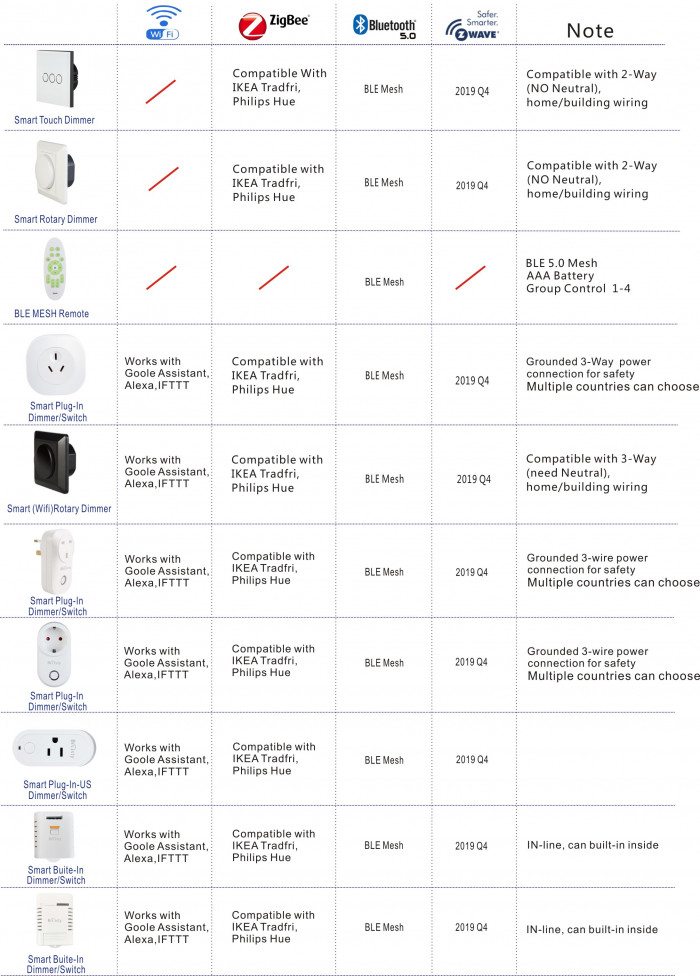
In 2017 IKEA released firmwares which makes their devices fully ZLL compliant, so that they started to work with e.g. Philips Hue.
Home Assistant
-
- zigpy – Zigbee protocol stack integration project to implement the Zigbee Home Automation standard as a Python 3 library.
- Спрашиваем у Алисы значения состояний датчиков и прочего из Home asisstant – описанным методом мы можем спрашивать у Алисы (гугла) к примеру, какая температура в комнате, кто из person где находится, можем попросить Алису скачать фильм в вашу библиотеку Plex, запрашивать состояние сущностей и многое другое, в том числе, и управлять сущностями HASS
Examples
Energy
- easyEnergy makes it possible to retrieve the dynamic energy/gas prices (see also prijzenfeeds).
- Webasto Unite Laadstation 22 kW – €299 (68% off
€949)
Custom cards
External sensors and controllers
- OpenMQTTGateway – bridge from 433/315 mHz, IR, Bluetooth, GSM to MQTT.
- SmartIR – a custom Home Assistant component for controlling AC units, TV sets and fans via IR and RF controllers.
- Broadlink – supports WiFi + IR
Extras
- For Z-Wave support (see also Supported Z-Wave USB Sticks & Hardware Modules) run:
apt-get install g++ libpython3.9-dev libudev-dev && pip3 install homeassistant-pyozw==0.1.4 --prefix=~/.homeassistant/deps
Successful HASS log:
INFO (Dummy-3) [openzwave] Driver ready using library Static Controller version Z-Wave 2.78
INFO (Dummy-3) [openzwave] home_id 0x014ce230, controller node id is 1
INFO (MainThread) [homeassistant.components.zwave] Z-Wave node 1 ready after 1 seconds
INFO (MainThread) [homeassistant.helpers.entity_registry] Registered new zwave.zwave entity: zwave.aeon_labs_dsa02203_z_stick_s2
- Google Maps to track users' location via unofficial API
- To create cookies file use new private window (otherwise some cookies might get mixed with another account). After login check that necessary persons are displayed on Google Maps (otherwise re-enable location sharing on their devices).
-
- Auto entities – automatically populate lovelace cards with entities matching certain criteria
-
- Changing colors using using
state-iconorcustom:card-moddercards (i.e. without CustomUI): -
- Working reports:
- Failed reports:
Managed installation
# apt-get install python3-pip python3-setuptools
# mkdir -m 770 /var/lib/homeassistant
# useradd -d /var/lib/homeassistant -G dialout -r homeassistant
# chown homeassistant.homeassistant /var/lib/homeassistant
# su - homeassistant
$ pip3 install homeassistant --prefix=~/.homeassistant/deps
$ ln -s .homeassistant/deps/bin bin
$ ln -s .homeassistant/deps/lib/python3.7/site-packages packages
# cat <<'EOF' > /etc/systemd/system/homeassistant.service
[Unit]
Description=Home Assistant
After=network-online.target

[Service]
Type=simple
User=homeassistant
UMask=0027
Environment=PYTHONPATH=/var/lib/homeassistant/packages
Environment=TMP=/var/tmp
# [optional] scan network to populate ARP table:
#ExecStartPre=/usr/bin/nmap --open -p 23,80 -oG - 10.0.1.0/24
ExecStart=/var/lib/homeassistant/bin/hass
# Don't log output to syslog:
StandardOutput=null
# Enable if Home Assistant crashes:
# Below will restart the service StartLimitBurst times. For that set StartLimitInterval=RestartSec*StartLimitBurst+small_delta
#Restart=on-failure
#RestartSec=20
#StartLimitInterval=80
#StartLimitBurst=3

[Install]
WantedBy=multi-user.target
EOF
# systemctl daemon-reload
# systemctl enable homeassistant
Docker installation
- Create/copy configuration to
/etc/homeassistant.# apt-get install -y docker-ce docker-ce-cli docker-compose-plugin containerd.io # cat <<'EOF' > /var/lib/homeassistant/docker-compose.yaml version: "3.6" # minimum version level that supports "tmpfs" volume type services: homeassistant: container_name: homeassistant image: ghcr.io/home-assistant/home-assistant:2023.4.0 restart: unless-stopped privileged: true volumes: - /etc/homeassistant:/config - /etc/localtime:/etc/localtime:ro - /run/mysqld:/run/mysqld:ro network_mode: host frigate: container_name: frigate image: blakeblackshear/frigate:0.12.0-beta2 restart: unless-stopped privileged: true # this may not be necessary for all setups # check here for more information about how to calculate this value: https://docs.frigate.video/frigate/installation#calculating-required-shm-size shm_size: "64mb" volumes: - /etc/localtime:/etc/localtime:ro - /etc/frigate:/config - /home/frigate:/media/frigate - type: tmpfs # Optional: 1GB of memory, reduces SSD/SD Card wear target: /tmp/cache tmpfs: size: 1000000000 network_mode: host EOF # cat <<'EOF' > /etc/systemd/system/homeassistant.service [Unit] Description=Home Assistant After=network-online.target mosquitto.service mariadb.service [Service] Type=simple # Discover the network to learn hostnames of various devices: ExecStartPre=/usr/bin/nmap --open -p 23,80 -oG - 10.0.1.0/24 # Builds, (re)creates, starts, and attaches to containers. If the process encounters an error, the exit code for this command is 1. If the process is interrupted using SIGINT (ctrl + C) or SIGTERM, the containers are stopped, and the exit code is 0. ExecStart=docker compose -f /var/lib/homeassistant/docker-compose.yaml up TimeoutStopSec=30 [Install] WantedBy=multi-user.target
 For hardware acceleration on Intel chipsets:
 # apt-get install i965-va-driver
If the following error is displayed:
# ffmpeg -hwaccel vaapi -i test.mp4 -c:v libx264 output.mp4
...
[AVHWDeviceContext @ 0x559f7e1aabc0] libva: /usr/lib/x86_64-linux-gnu/dri/iHD_drv_video.so init failed
Stream mapping:
  Stream #0:0 -> #0:0 (h264 (native) -> h264 (libx264))
  Stream #0:1 -> #0:1 (aac (native) -> aac (native))
...
then check that
vainfo(should be installed viaapt-get install vainfo) outputs profiles usingi965_drv_video.sodriver:# vainfo libva info: VA-API version 1.10.0 libva info: Trying to open /usr/lib/x86_64-linux-gnu/dri/iHD_drv_video.so libva info: Found init function __vaDriverInit_1_10 libva error: /usr/lib/x86_64-linux-gnu/dri/iHD_drv_video.so init failed libva info: va_openDriver() returns 1 libva info: Trying to open /usr/lib/x86_64-linux-gnu/dri/i965_drv_video.so libva info: Found init function __vaDriverInit_1_8 libva info: va_openDriver() returns 0 vainfo: VA-API version: 1.10 (libva 2.10.0) vainfo: Driver version: Intel i965 driver for Intel(R) Haswell Desktop - 2.4.1 vainfo: Supported profile and entrypoints VAProfileH264ConstrainedBaseline: VAEntrypointVLD VAProfileH264ConstrainedBaseline: VAEntrypointEncSlice VAProfileH264Main : VAEntrypointVLD VAProfileH264Main : VAEntrypointEncSlice VAProfileH264High : VAEntrypointVLD VAProfileH264High : VAEntrypointEncSlice VAProfileH264MultiviewHigh : VAEntrypointVLD VAProfileH264MultiviewHigh : VAEntrypointEncSlice ...and then force
ffmpegto use that driver:LIBVA_DRIVER_NAME=i965 ffmpeg -hwaccel vaapi -i test.mp4 -c:v libx264 output.mp4
If OK, then add
ffmpeg:
  hwaccel_args: preset-vaapi
to
/etc/frigate/config.yml.
More info:
Additionally install intel-gpu-tools and monitor the load on GPU:
# apt-get install intel-gpu-tools; intel_gpu_top

intel-gpu-top: Intel Haswell (Gen7) @ /dev/dri/card0 -  238/ 238 MHz;   0% RC6;  0.36/ 8.82 W;       14 irqs/s

      IMC reads:     1219 MiB/s
     IMC writes:      345 MiB/s

         ENGINES     BUSY                                                                                                   MI_SEMA MI_WAIT
       Render/3D    1.50% |                                                                                               |      0%      0%
         Blitter    0.00% |                                                                                               |      0%      0%
           Video    2.49% |██▍                                                                                            |      0%      0%
    VideoEnhance    0.00% |                                                                                               |      0%      0%
See also:
FAQ
Error executing query: (MySQLdb.OperationalError) (1271, “Illegal mix of collations for operation 'UNION'”)
utf8mb4_general_ci and change the collation for all of them one by one to utf8mb4_unicode_ci:[homeassistant_db]> SELECT TABLE_NAME, table_collation FROM information_schema.tables WHERE table_schema = 'hass_db' AND table_collation = 'utf8mb4_general_ci'; +-----------------------+--------------------+ | TABLE_NAME | table_collation | +-----------------------+--------------------+ | recorder_runs | utf8mb4_general_ci | | schema_changes | utf8mb4_general_ci | | statistics | utf8mb4_general_ci | | statistics_runs | utf8mb4_general_ci | | statistics_short_term | utf8mb4_general_ci | +-----------------------+--------------------+ [homeassistant_db]> ALTER TABLE recorder_runs CONVERT TO CHARACTER SET utf8mb4 COLLATE utf8mb4_unicode_ci, LOCK=exclusive; ...
The solution is provided in issue 73235 (see also issues 92852, issue 93410).
Visualization
- Install packages:
# cat <<EOF > /etc/apt/sources.list.d/grafana.list
deb https://packages.grafana.com/oss/deb stable main
EOF
# wget -nv -O - https://packages.grafana.com/gpg.key | sudo apt-key add -
2019-08-10 12:36:19 URL:https://packages.grafana.com/gpg.key [1694/1694] -> "-" [1]
OK
# apt-get update
# apt-get install grafana influxdb influxdb-client mosquitto
- Setup Grafana:
# chgrp grafana -R /etc/grafana
# chmod o-rwx -R /etc/grafana
# patch -p0 <<'EOF'
--- /etc/grafana/grafana.ini.orig    2020-02-11 22:13:49.346687600 +0100
+++ /etc/grafana/grafana.ini    2020-02-06 19:05:54.087086389 +0100
@@ -33,6 +33,7 @@

 # The ip address to bind to, empty will bind to all interfaces
 ;http_addr =
+http_addr = 127.0.0.1

 # The http port  to use
 ;http_port = 3000
@@ -48,6 +49,7 @@
 # If you use reverse proxy and sub path specify full url (with sub path)
 # See https://grafana.com/docs/grafana/latest/installation/behind_proxy/
 ;root_url = http://localhost:3000
+root_url = https://www.host.com/grafana/

 # Serve Grafana from subpath specified in `root_url` setting. By default it is set to `false` for compatibility reasons.
 ;serve_from_sub_path = false
@@ -172,12 +174,15 @@

 # set to true if you host Grafana behind HTTPS. default is false.
 ;cookie_secure = false
+cookie_secure = true

 # set cookie SameSite attribute. defaults to `lax`. can be set to "lax", "strict" and "none"
 ;cookie_samesite = lax

 # set to true if you want to allow browsers to render Grafana in a <frame>, <iframe>, <embed> or <object>. default is false.
+# See also https://grafana.com/docs/grafana/latest/reference/share_panel/
 ;allow_embedding = false
+allow_embedding = true

 # Set to true if you want to enable http strict transport security (HSTS) response header.
 # This is only sent when HTTPS is enabled in this configuration.
@@ -222,6 +227,7 @@
 [users]
 # disable user signup / registration
 ;allow_sign_up = true
+allow_sign_up = false

 # Allow non admin users to create organizations
 ;allow_org_create = true
@@ -231,6 +237,7 @@

 # Default role new users will be automatically assigned (if disabled above is set to true)
 ;auto_assign_org_role = Viewer
+auto_assign_org_role = Editor

 # Background text for the user field on the login page
 ;login_hint = email or username
@@ -389,8 +396,10 @@
 [auth.proxy]
 # Defaults to false, but set to true to enable this feature
 ;enabled = false
+enabled = true
 # HTTP Header name that will contain the username or email
 ;header_name = X-WEBAUTH-USER
+header_name = X-WEBAUTH-USER
 # HTTP Header property, defaults to `username` but can also be `email`
 ;header_property = username
 # Set to `true` to enable auto sign up of users who do not exist in Grafana DB. Defaults to `true`.
@@ -405,9 +414,12 @@
 # Limit where auth proxy requests come from by configuring a list of IP addresses.
 # This can be used to prevent users spoofing the X-WEBAUTH-USER header.
 ;whitelist = 192.168.1.1, 192.168.2.1
+whitelist = 127.0.0.1
 # Optionally define more headers to sync other user attributes
 # Example `headers = Name:X-WEBAUTH-NAME Email:X-WEBAUTH-EMAIL Groups:X-WEBAUTH-GROUPS`
 ;headers = Email:X-User-Email, Name:X-User-Name
+# Check out docs for more details on the below setting
+enable_login_token = false

 #################################### Basic Auth ##########################
 [auth.basic]
EOF
 Setup datasources
 # cat <<EOF > /etc/grafana/provisioning/datasources/mysql.yaml apiVersion: 1 deleteDatasources: - name: MySQL datasources: - name: MySQL type: mysql editable: false url: 10.0.0.2:3306 database: source_db user: grafana secureJsonData: password: abc123 Install necessary plugins:
 # grafana-cli plugins list-remote # grafana-cli plugins install pr0ps-trackmap-panel # grafana-cli --pluginUrl https://github.com/alexandrainst/alexandra-trackmap-panel/archive/refs/heads/master.zip plugins install alexandra-trackmap-panel
- Setup Apache:
# cat <<'EOF' > /etc/apache2/conf-available/grafana.proxy.conf <IfModule mod_proxy.c> <Location "/grafana"> # Grafana requires a slash at the end of the path, hence implementing proxying using mod_rewrite: RewriteEngine on # In this context the path is actually /var/www/grafana, hence don't start regexp with ^ RewriteRule /grafana$ /grafana/ [R,L] RewriteRule /grafana/(.*)$ http://localhost:3000/$1 [P,L] SSLRequireSSL AuthType Basic AuthName "Grafana" Require valid-user # Prevent the client from setting these headers: RequestHeader unset Authorization RequestHeader unset X-WEBAUTH-USER RequestHeader set X-WEBAUTH-USER %{REMOTE_USER}s </Location> <Location "/grafana/api/live/ws"> ProxyPass ws://localhost:3000/api/live/ws ProxyPassReverse ws://localhost:3000/api/live/ws SSLRequireSSL Require all granted </Location> </IfModule> EOF # a2enconf grafana.proxy # systemctl restart apache2.service - Setup Mosquitto MQTT server1) (see also Authentication and authorization in InfluxDB):
# mosquitto_passwd -c /etc/mosquitto/passwd <user>
Password: ****
Reenter password: ****
# cd /etc/mosquitto
/etc/mosquitto# chgrp mosquitto -R .
/etc/mosquitto# chmod o-rwx -R .
 Setup InfluxDB server:
# chgrp influxdb -R /etc/influxdb
# chmod o-rwx -R /etc/influxdb
# influx
> CREATE USER admin WITH PASSWORD 'secret1' WITH ALL PRIVILEGES
> CREATE DATABASE hass_db
> USE hass_db
> CREATE USER hass WITH PASSWORD 'secret2'
> GRANT ALL ON hass_db TO hass
> exit
# patch -p0 <<'EOF'
--- /etc/influxdb/influxdb.conf.orig    2018-10-19 06:47:59.000000000 +0200
+++ /etc/influxdb/influxdb.conf 2020-01-27 12:01:56.766787568 +0100
@@ -223,7 +223,7 @@
   # bind-address = ":8086"

   # Determines whether user authentication is enabled over HTTP/HTTPS.
-  # auth-enabled = false
+  auth-enabled = true

   # The default realm sent back when issuing a basic auth challenge.
   # realm = "InfluxDB"
EOF
# systemctl restart influxd
- Setup Home Assistant to dump the entity states also to InfluxDB:
influxdb:
  database: hass_db
  username: hass
  password: !secret hass_password
  default_measurement: state
  component_config_glob:
    sensor.*humidity:
      override_measurement: humidity
    sensor.*temperature:
      override_measurement: temperature
 Setup MySQL backend support to replace event state recorder
 - Run
# apt-get install python3-mysqldb
# mysql -uroot -p <<'EOF'
CREATE DATABASE hass_db;
GRANT SELECT ON hass_db.* TO 'hass'@'localhost' IDENTIFIED BY 'zzz';
GRANT SELECT ON hass_db.* TO 'grafana'@'localhost' IDENTIFIED BY 'xxx';
EOF
- Change
homeassistant.serviceto read:[Unit] After=network-online.target mariadb.service
- Change
configuration.yamlto read:recorder: db_url: mysql://hass:zzz@localhost/hass_db?unix_socket=/run/mysqld/mysqld.sock&charset=utf8
How to implement datetime filters and grouping for SQL source?
 First option would be to use the standard function
 $__timeGroup(dateColumn, '5m'):
...
WHERE $__timeFilter(time_created)
GROUP BY $__timeGroup(time_created, $__interval)
ORDER BY $__timeGroup(time_created, $__interval) ASC
 Second option would be to introduce a special variable, which will provide more fine-grained control but will require the user to select manually the appropriate scaling where necessary:
- Create
$intervaltemplate variable as in this post:SELECT 'minute' AS __text, '%Y%m%d%H%i' AS __value UNION SELECT 'hour' AS __text, '%Y%m%d%H' AS __value UNION SELECT 'day' AS __text, '%Y%m%d' AS __value UNION SELECT 'month' AS __text, '%Y%m' AS __value
- Use the following SQL query template (

last_updatedis indexed):SELECT MAX(unix_timestamp((last_updated))) AS TIME, MAX(volume) AS VALUE, 'Volume' AS metrics FROM states WHERE $__timeFilter(last_updated) AND ... GROUP BY date_format(last_updated, '$interval') ORDER BY date_format(last_updated, '$interval') ASC
See also: Visualize Your Data With Grafana, Percona Live 2017 (Daniel Lee)
How do add series to second Y axis?
How to increase label font size on OSM maps?
- Subscribe to free plan on Rapid, add “Retina Tiles” to profile and get your API key.
- Use the following URL in Grafana panel settings for Track Map Grafana plugin:
https://retina-tiles.p.rapidapi.com/local/osm@2x/v1/{z}/{x}/{y}.png?rapidapi-key=YOUR-RAPID-API-KEY(original value:https:{s}.tile.openstreetmap.org/{z}/{x}/{y}.png'') See also: How to customize font size on OSM maps? </note> ===== Z-Wave ===== * http://www.z-wave.ru/ * Catching the Z-Wave, Introduction to Z-Wave, An introduction to the Z-Wave protocol * Products: Продукты Z-Wave, Компоненты умного дома, Z-Wave Products, Z-Wave устройства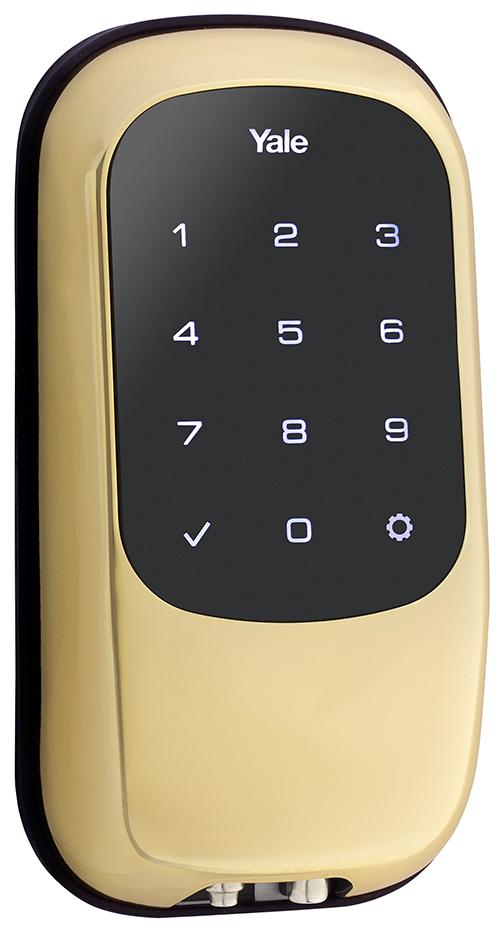 * What Is A Good Deadbolt Lock Compatible With my Lynx Touch L7000?
* Yale Security YRD220-ZW-619 Electronic Touch Screen Deadbolt, Fully Motorized with Z-Wave Technology
* YRD120-ZW-US Manual
* Can Hackers Unlock My Z-Wave Door Lock?
* Programming:
* Open Z-Wave, OpenZWave Control Panel
* Binary Protocol for the ZWave Slave
* How to develop Z-Wave Devices
* Z-Wave Developer's Kit
* Z-Wave Controller Setup on Raspberry Pi
* Adapters:
* Z-Wave Controllers Compatible with Arduino
* Leviton Z-Wave Vizia RF Plug-In Serial Interface Module RS232 ASCII Interface
* ACT ZCS101 Z-Wave RS232 Interface
* Zarduino
* WuKong (ATMega2560 based, Arduino-compatible device)
* Драйвер RaZberry для iRidium
* Z-Uno = Arduino + Z-Wave
